Toyota Avalon (XX50): Motor Cable
Components
COMPONENTS
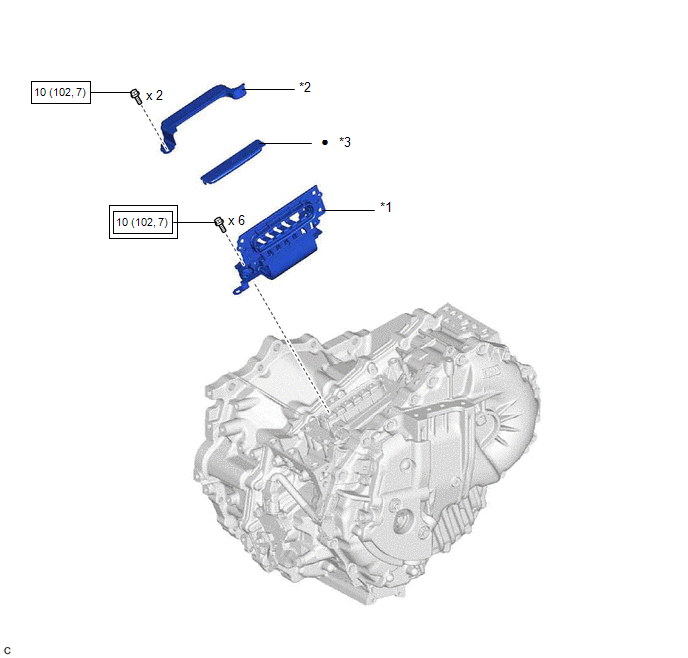
ILLUSTRATION
|
*1 | MOTOR CABLE |
*2 | CONNECTOR COVER |
|
*3 | TERMINAL CAP |
- | - |
 |
Tightening torque for "Major areas involving basic vehicle performance such as moving/turning/stopping": N*m (kgf*cm, ft.*lbf) |
 |
N*m (kgf*cm, ft.*lbf): Specified torque |
|
â—Ź | Non-reusable part |
- | - |
Installation
INSTALLATION
PROCEDURE
1. INSTALL MOTOR CABLE
CAUTION:
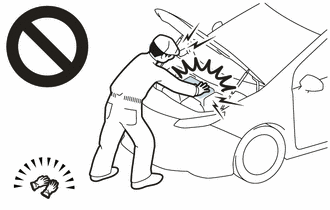
Be sure to wear insulated gloves.
(a) Using an insulated tool, install the motor cable to the hybrid vehicle transaxle assembly with the 6 bolts.
Torque:
10 N·m {102 kgf·cm, 7 ft·lbf}
NOTICE:
- Keep the motor cable terminals and their installation area free from foreign matter, water, etc.
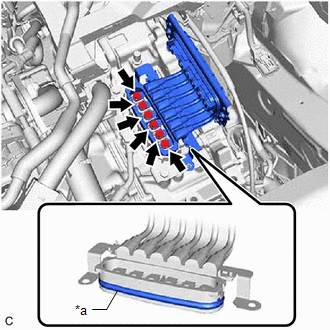
- Do not touch the waterproof seal or terminals of the motor cable.
(b) Engage the 2 claws to install a new terminal cap to the hybrid vehicle transaxle assembly.
NOTICE:
- Keep the terminal cap and its installation area free from foreign matter, water, etc.
- Do not pinch the O-ring.
- Check that the terminal cap is securely installed.
(c) Temporarily install the connector cover to the hybrid vehicle transaxle assembly with the 2 bolts.
(d) Tighten the 2 bolts to install the connector cover.
Torque:
10 N·m {102 kgf·cm, 7 ft·lbf}
2. INSTALL INVERTER WITH CONVERTER ASSEMBLY
Click here 
Removal
REMOVAL
CAUTION / NOTICE / HINT
The
necessary procedures (adjustment, calibration, initialization, or
registration) that must be performed after parts are removed and
installed, or replaced during motor cable removal/installation are shown
below.
Necessary Procedures After Parts Removed/Installed/Replaced |
Replaced Part or Performed Procedure |
Necessary Procedure | Effect/Inoperative Function when Necessary Procedure not Performed |
Link |
|
*: When performing learning using the Techstream.
Click here  |
|
Auxiliary battery terminal is disconnected/reconnected |
Perform steering sensor zero point calibration |
Lane departure alert system (w/ Steering Control) |
 |
|
Pre-collision system |
|
Intelligent clearance sonar system* |
|
Lighting system (w/ AFS)(EXT) |
|
Memorize steering angle neutral point |
Parking assist monitor system |
 |
|
Panoramic view monitor system |
 |
|
Replacement of ECM | Perform Vehicle Identification Number (VIN) registration |
MIL illuminates |
 |
|
Replacement of inverter with converter assembly |
Resolver learning |
- DTCs are stored
- Slight vibration at a vehicle speed of 5 km/h (3 mph) or less
- Shock or vibration during acceleration
|
 |
CAUTION:
NOTICE:
- After turning the power switch off, waiting time may be required before
disconnecting the cable from the negative (-) auxiliary battery
terminal. Therefore, make sure to read the disconnecting the cable from
the negative (-) auxiliary battery terminal notices before proceeding
with work.
Click here 
- If the ECM has been struck or dropped, replace it.
- Perform Vehicle Identification Number (VIN) registration when replacing the ECM.
Click here 
PROCEDURE
1. REMOVE INVERTER WITH CONVERTER ASSEMBLY
Click here 
2. REMOVE MOTOR CABLE
CAUTION:
Be sure to wear insulated gloves.
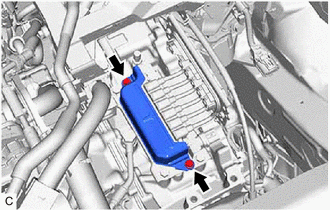
| (a) Remove the 2 bolts and connector cover from the hybrid vehicle transaxle assembly. |
|
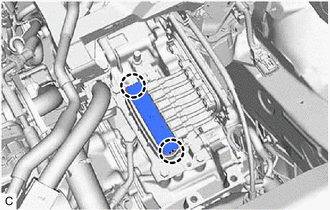
| (b) Disengage the 2 claws to remove the terminal cap from the hybrid vehicle transaxle assembly. |
|
| (c) Using an insulated tool, remove the 6 bolts and motor cable from the hybrid vehicle transaxle assembly.
NOTICE:
- Keep the motor cable terminals and their installation area free from foreign matter, water, etc.
- Do not touch the waterproof seal or terminals of the motor cable.
- Cover the hole where the motor cable was installed with tape or
equivalent (non-residue type) to prevent entry of foreign matter.
| |


